POWERUp 2020 Guided Lab (Use Node.js to build Business Apps)
This lab walks you through building a series of Node.js applications that work with employee data. To get started, make sure your browser is pointed to: https://spaces.profoundjs.com/ide/profound-logic/guided-lab/.
The lab requires only a browser to complete. You can use the virtual lab PC provided by POWERUp or your own computer to complete the exercises.
To view this document in a separate browser tab, click here.
Agenda
You will use Profound.js Spaces to build the following modules:
- Employee Lookup Module (Exercise 1, Exercise 2, and Exercise 3)
- Employee Listing Module (Exercise 4, Exercise 5, and Exercise 6)
- Employee Listing Web Service (Exercise 7)
- Employee Details Web Service (Exercise 8)
- Module to consume an Employee Listing Web Service (Exercise 9)
- Module to use npm to email an employee list (Exercise 10)
The exercises are intended to be followed in order.
What is the Profound.js Spaces website?
- Cloud environment for Node.js development
- Full IDE with Visual Designer, Editor, Debugger, and Node.js preinstalled
- Capabilities
- Design Screens
- Develop and Run applications
- Full Debugging
- Install npm Packages
- Manage, start, and stop your own Node.js Sever
- Work with Active Sessions to see end-user activity
- Hosted Database and built-in Database Explorer
- Command-line Terminal for full control of your space
- Share and collaborate with other developers
What you need to get started and complete the exercises
The Profound.js Spaces site (https://spaces.profoundjs.com) provides all the tools you need. You just need a modern browser, such as:
- Google Chrome
- Mozilla Firefox
Using Spaces
- Everyone can have their own isoldated space (or as many spaces as you need) on the site
- The spaces are hosted in the cloud
- Free to use for the purpose of building and testing applications; however, hosting full-blown production applications in the Profound.js Spaces cloud environment can have costs
- Each space has:
- Its own files
- Its own database
- Its own server
- Its own git repositary
- Create spaces by either:
- Visiting https://spaces.profoundjs.com and clicking "New Space" (you can select a template or start from scratch)
- Forking another space (this is how we'll get started with this Lab)
- To save your space permanently:
- You must create a Profound.js Spaces account (or sign in using GitHub, Google, or Facebook)
- You must then publish the space and give it a name
- You can share your spaces with others:
- Each space has its own unique URL for opening and running the space
- Set public permission on your space as you wish and invite contributors if you want to work together with others
Let's get started!
- Visit https://spaces.profoundjs.com/ide/profound-logic/guided-lab/
- Click Fork... on the Home Menu
- If you are not signed in, Create an Account or Sign In
- Give your space a name. For example: My Lab
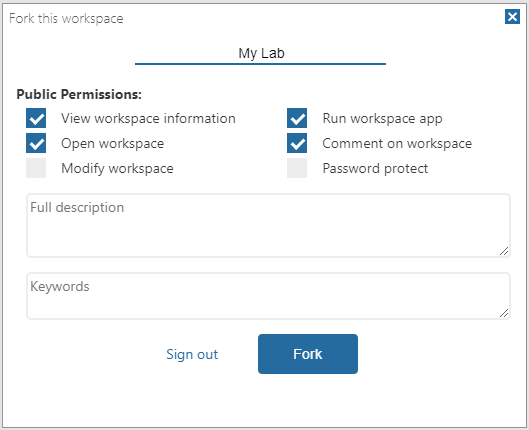
- Click Fork
- Click Close
- Notice the URL in your browser will change to show your profile name and your new workspace name
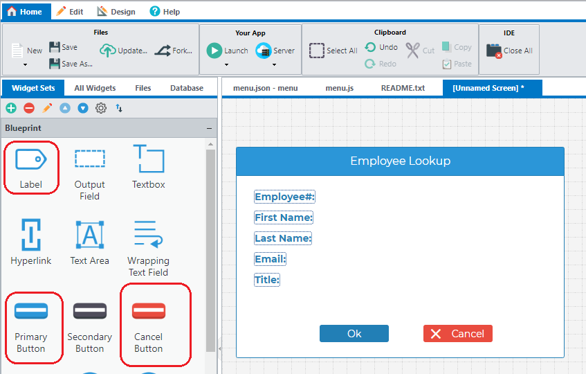
Exercise 1 (Employee Lookup)
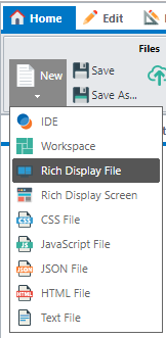
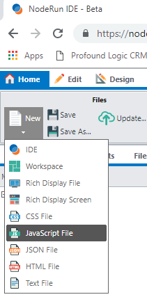
- Select New -> Rich Display File
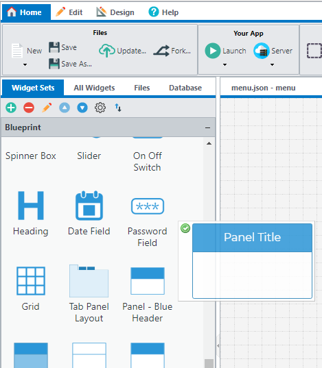
- Add Panel
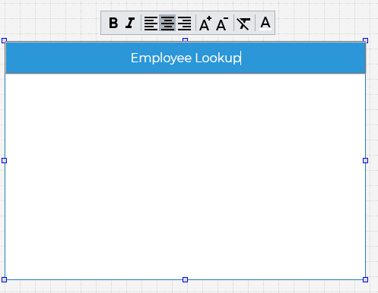
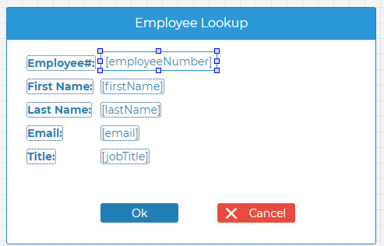
Build Employee Lookup Screen
- Add labels
- Add Ok and Cancel buttons
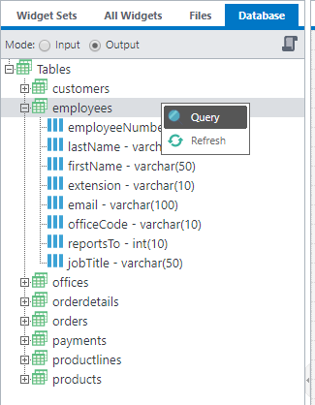
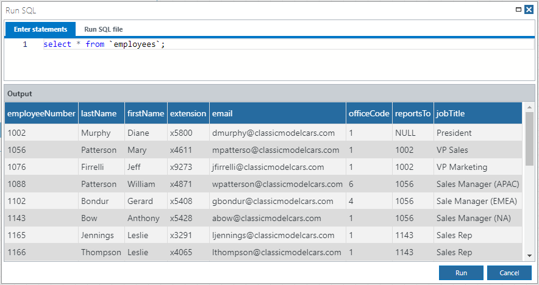
Find employee database table
- Find employees under the Database Tab
- Review the data
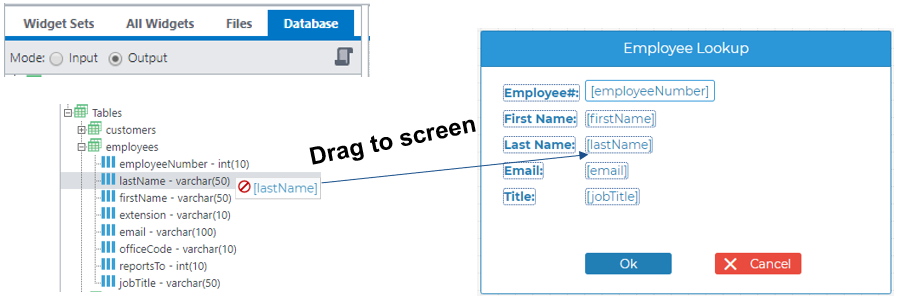
Use employee database table
In Input Mode, drag employeeNumber to screen

In Output Mode, drag lastName, firstName, email, jobTitle to screen
Bind Buttons
- Bind response of Ok button to ok
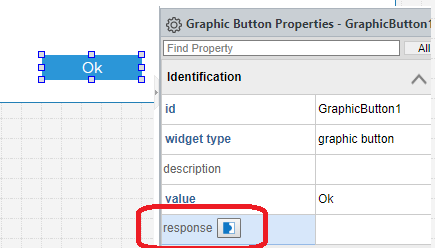
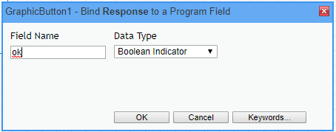
- Similarly, bind response of Cancel button to cancel
The case of the field names matters. "ok" is not the same as "Ok".
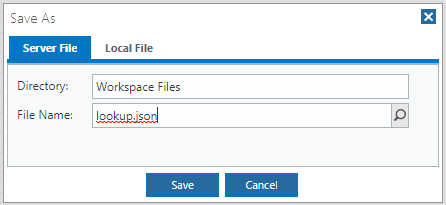
Name your screen + Save
- Click the Edit Name icon under Screens and type lookup
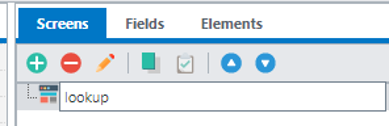
- Click Save and name the file lookup.json
Create Node.js script for Employee Lookup
- Select New -> JavaScript File
- Write code as shown below
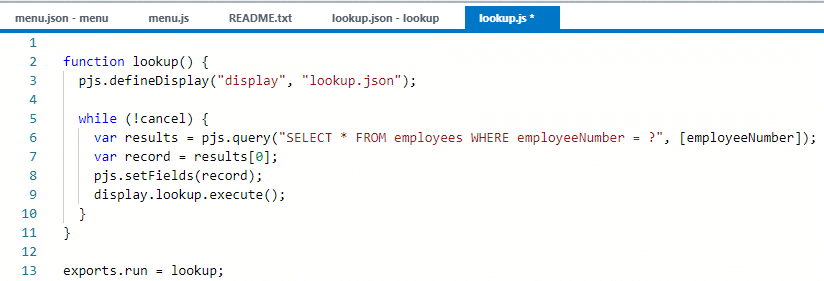
- Save as lookup.js
Code Explained
exports.default = lookup
- In Node.js, every public function must be exported
- The name run indicates the main function to run when this script is executed
pjs.defineDisplay("display", "lookup.json");
- The pjs.defineDisplay() API declares a Rich Display File and all of its fields within the function
- The first parameter ("display") becomes an object that contains all Rich Display screens as properties
- The second parameter ("lookup.json") refers to the Rich Display json file
display.lookup.execute();
- display is the Rich Display File object
- lookup is the screen name
- The execute() method sends the screen to the browser, waits for the user to respond, and reads input from the user
while (!cancel) {
  // ...
}
- Keeps executing while the Cancel button is not pressed
- cancel is a field bound to the response property of the Cancel button
pjs.query("SELECT * FROM employees WHERE employeeNumber = ?", [employeeNumber]);
- The pjs.query() API executes an SQL query and returns a JavaScript array of records
- The first parameter is an SQL statement where ?’s are parameter markers
- The second parameter is an array of values to use for the parameter markers
var record = results[0];
- The SQL query expects only 1 record, so we retrieve the first record
- In JavaScript, arrays start with index 0
pjs.setFields(record);
- The pjs.setFields() API assigns fields from a JavaScript record or object to any field defined in your Node.js script, including fields defined with pjs.defineDisplay()
- It's a quick way to move queried data directly to the screen
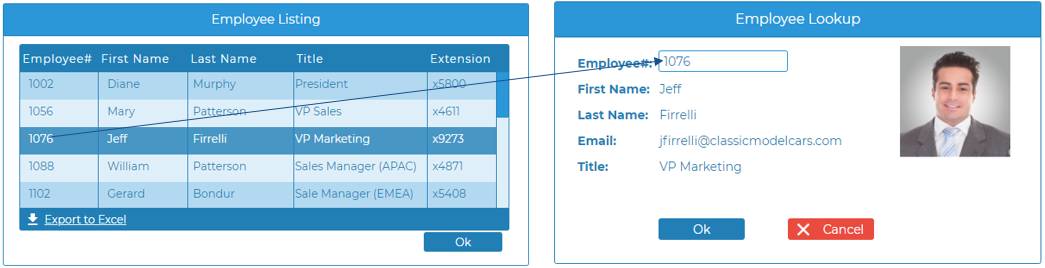
Try your application
- Select Launch App in Browser Tab
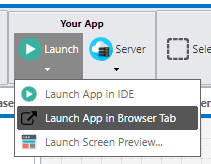
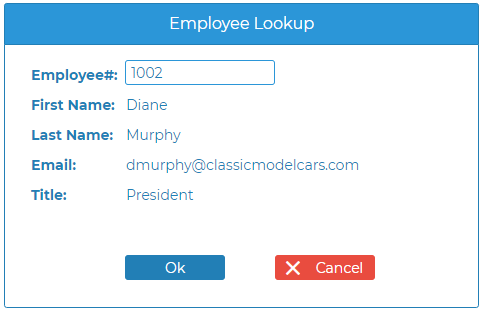
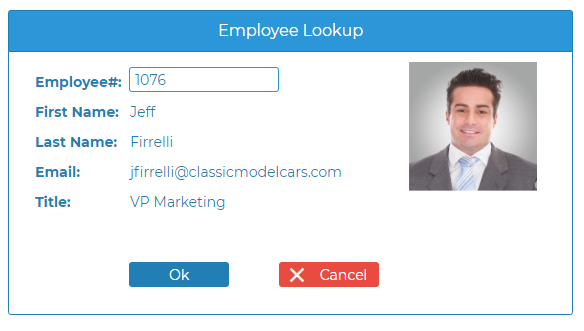
- The running application will look like this:
Exercise 2 (Using database-driven auto-complete)
- Switch back to the Visual Designer and select the employeeNumber textbox
- Type +data under Find Property
- Type employees in the choices database table property
- Select the first 3 fields for the choice options field property and press OK
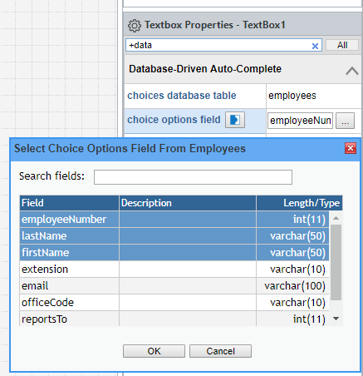
- Click Save
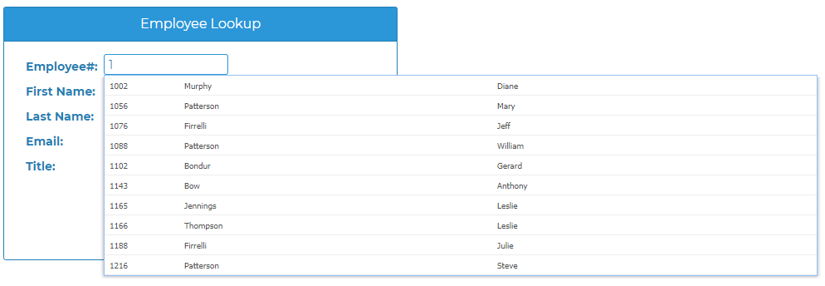
Try using the auto-complete feature
- Refresh (or exit and relaunch) the application
- Then start typing a value in the Employee# box
Exercise 3 (Adding a dynamic image)
In this exrecise, we'll add an employee photo to the Employee Lookup screen.
Add employee photo as Image Widget
Drag image widget to the Visual Designer canvas:
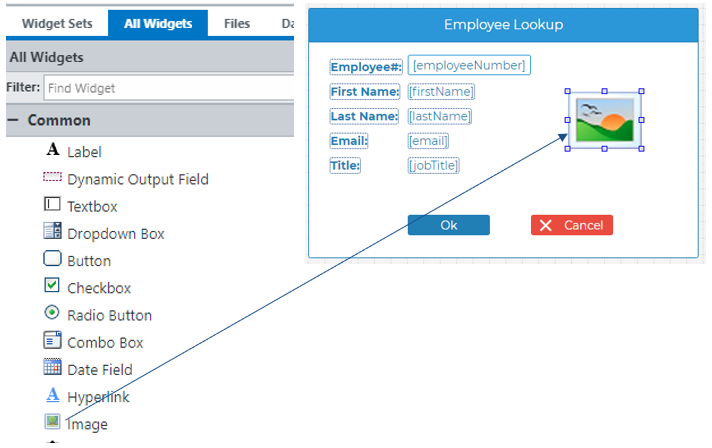
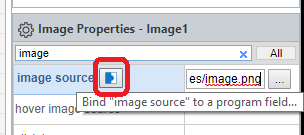
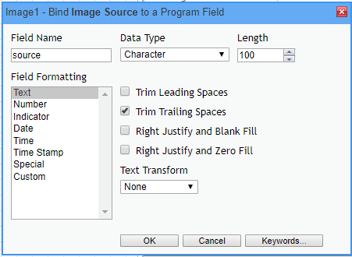
Bind the image source property to the field name source
Assign employee photo source field
Add the following line of code:

Test employee photo feature
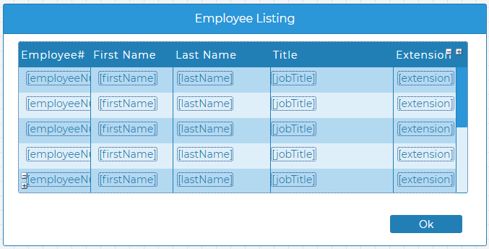
Exercise 4 (Employee Listing)
- Select New -> Rich Display File
- Add Panel
Add Grid and Ok Button
- Drag grid widget to the canvas and drag a button to the canvas
- Add columns by click the plus (+) sign on the grid widget
- Rename columns by double-clicking each column
- Drag database fields into the first row of the grid
- Doubel-click to change the button text to "Ok", then bind the ok field to the response property of the Ok button
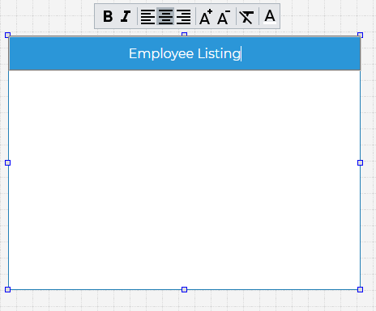
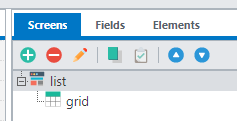
Name screen and grid; then save Rich Display File
- Screen must be named list, and grid must be named grid
- Rich Display File should be named list.json

Create Node.js script for Employee Listing
- Select New -> JavaScript File
- Write code as shown below
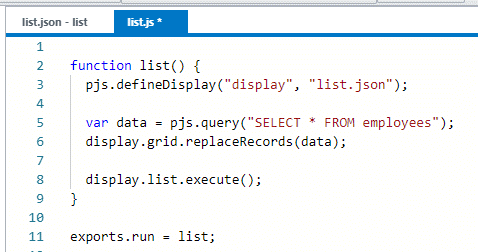
- Save as list.js
Code Explained
display.grid.replaceRecords(data);
- display is your Rich Display File object
- grid is the name given to your grid on the screen
- The replaceRecords() method replaces all records in the grid with an array of records passed in as a paramater
- Profound.js supports a variety of methods to populate grids
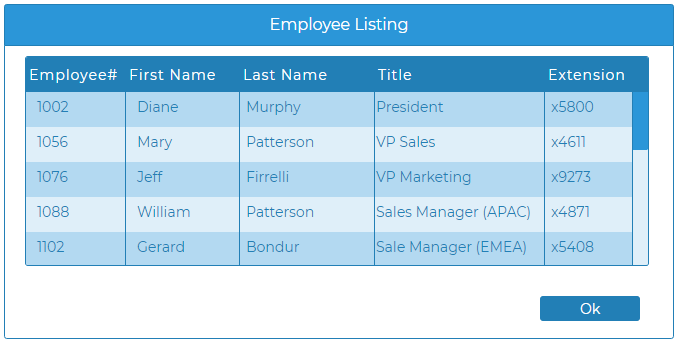
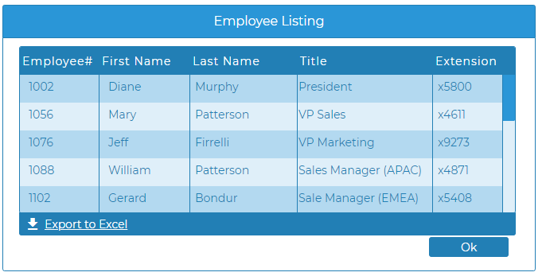
Try running Employee Listing option from Menu
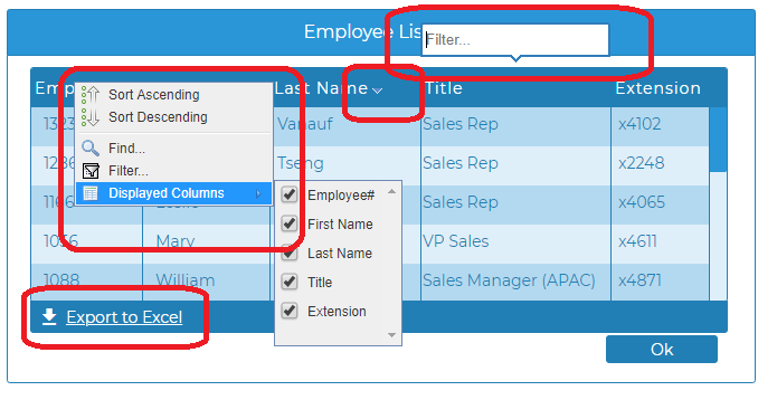
Exercise 5 (Enhance the grid)
In the Visual Designer, select the grid and set the following properties to true:
- sortable columns
- movable columns
- xlsx export
- find option
- filter option
- hide columns option
Save, then rerun the Employee Listing to test out the features
Exercise 6 (Connect listing to lookup)
This exercise allows users to click on an employee in the grid to see employee details.
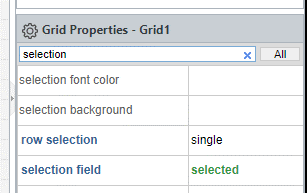
Configure row selection
Set the following grid properties:
row selection: single (Select this value from the dropdown)
selection field: Bind to a boolean named selected
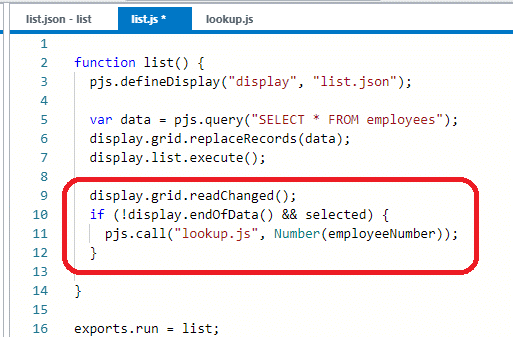
Add call from list.js to lookup.js
Code Explained
display.grid.readChanged();
if (!display.endOfData() && selected) {
  pjs.call("lookup.js", rec.employeeNumber);
}
- The readChanged() method reads the grid for changed records one at a time and populates display fields from the records found
- display.endOfData() returns a boolean value of true if no changed records were found
- selected is the boolean field we used to identify whether a specific record is selected or not
- pjs.call() calls another script or program
- Number() converts a delcared strongly-typed field to a primitive JavaScript value, which forces the employee number to be passed by value rather than by reference
Alternate approach
There are multiple ways to retrieve record data from a grid.
Using ES6 syntax, we can quickly retrieve all selected records into an array and then use the first record in the array.
var selectedRecords = display.grid.filter(entry => entry.selected);
var record = selectedRecords[0];
if (record) {
  pjs.call("lookup.js", record.employeeNumber);
}
selectedRecords[0] works well because single selection only allows one record to be selected at a time.
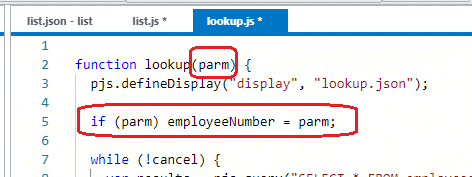
Modify lookup.js to receive parameter
Code Explained
if (parm) employeeNumber = parm;
- Checks if parm was passed, and if so, assign to employeeNumber as default value
- If we don't check for the existence of the parameter, a data decimal error may occur
Test connected modules
Exercise 7 (Listing Web Service)
- Select New -> JavaScript File
- Write code as shown below
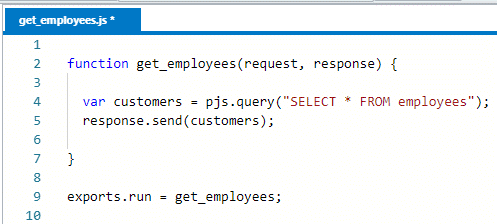
- Save as get_employees.js
Code Explained
function get_employees(request, response) {
  // ...
}
Profound.js Spaces use the popular Express.js web framework as its foundation. All Express.js Web Services receive a request and a response parameter.
- request is an object that represents everything about the Web Services request
- response is an object that supplies the methods you need to constuct and send a response
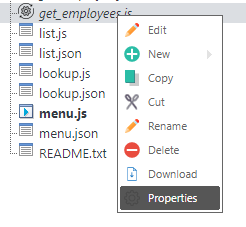
Create Web Service out of get_employees.js
Right-click the saved file under Files and select Properties:
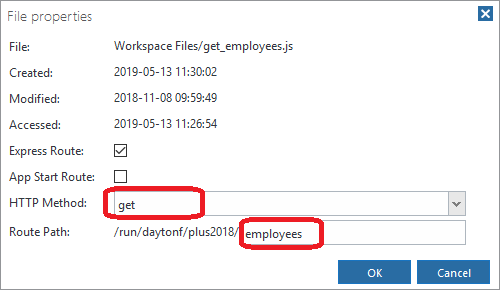
Then select the following:
- Express Route
- HTTP Method: get
- Route Path: employees
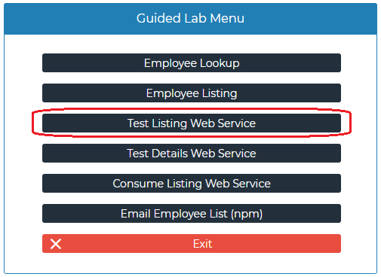
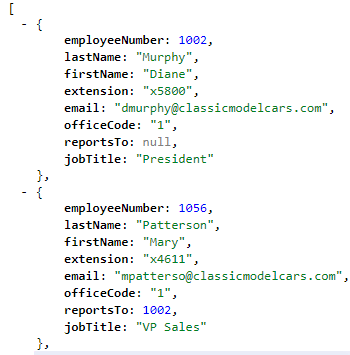
Test Listing Web Service
Exercise 8 (Details Web Service)
- Select New -> JavaScript File
- Write code as shown below
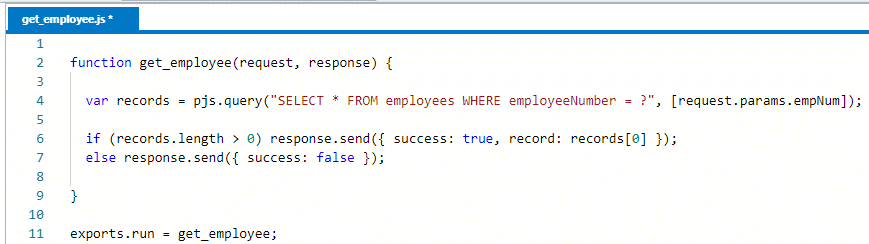
- Save as get_employee.js
Code Explained
var records = pjs.query("SELECT * FROM employees WHERE employeeNumber = ?", [request.params.empNum]);

if (records.length > 0) response.send({ success: true, record: records[0] });
else response.send({ success: false });
- request.params allows you to access parameters passed as part of the URL
- Other types of request parameters can be accessed as well
- request.query gives you query string parameters
- request.body gives you POST data parameters
- records.length specifies how many record were retrieved; if 0, we send a
{ success: false }response
Create Web Service out of get_employee.js
Right-click the saved file under Files and select Properties:

Then select the following:
- Express Route
- HTTP Method: get
- Route Path: employee/:empNum

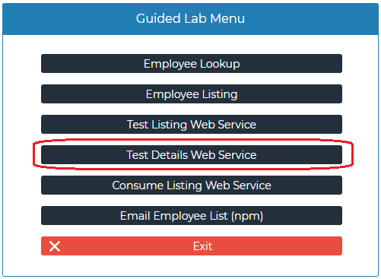
Test Details Web Service
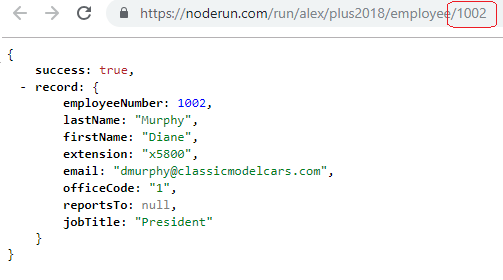
Try modifying employee number in the URL.
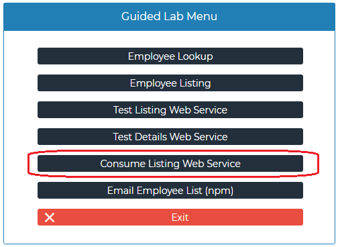
Exercise 9 (Consuming a Web Service)
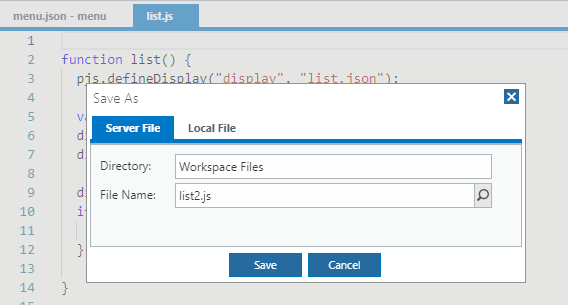
- Open list.js
- Save As list2.js
Call a Web Service
Replace:

With:
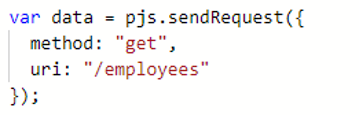
Code Explained
- The pjs.sendRequest() API makes a Web Services request
- The URI can be specified as relative or absolute
- The data is now requested from a Web Service instead of connecting to the database directly
Test Consuming a Web Service
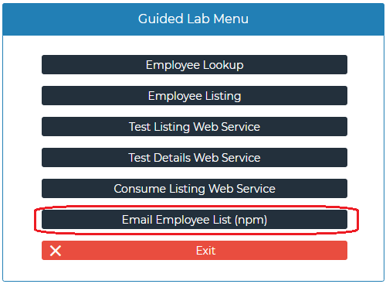
Exercise 10 (Using npm to email Employee List)
In this exercise, you will write code to email a list of employees to yourself.
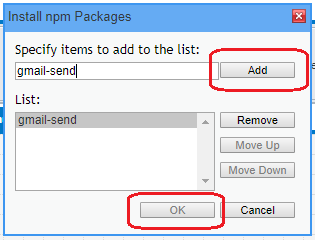
Install gmail-send npm package
You can install pacakges from the Server menu:
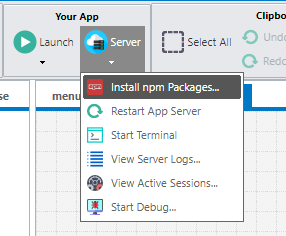

Alternatively, use the Terminal feature and type: npm install gmail-send
What is npm?
- www.npmjs.com hosts a repository of reusable Node.js packages
- There are many packages for almost every imaginable purpose
- Packages will often use other packages
- For example, nodemailer is popular package for sending emails
- gmail-send is a package that implements nodemailer, but simplifies usage specifically for sending emails from a gmail account
Create Node.js script named email.js
- Select New -> JavaScript File
- Write code as shown below
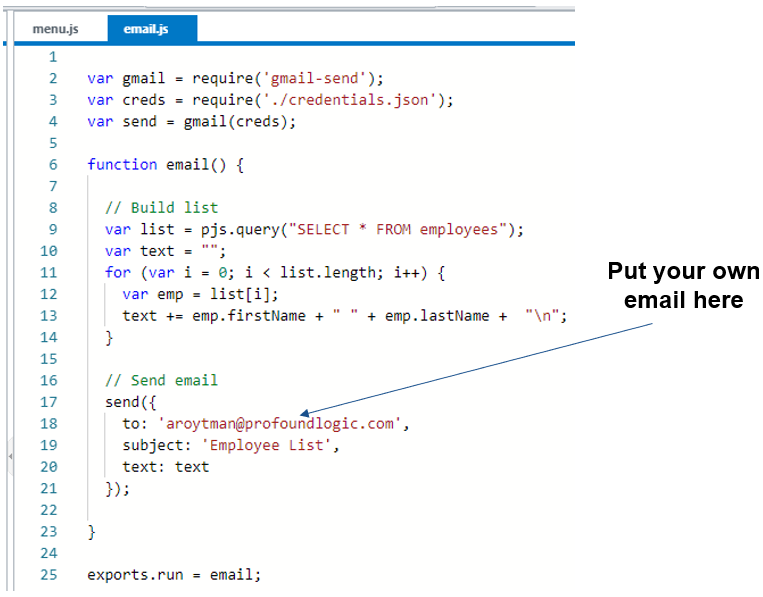
- Save as email.js
Code Explained
- require() is a Node.js API that loads files or loads installed npm packages
require('gmail-send')loads the gmail-send packagerequire('./credentials.json')loads gmail account credentials from a json file
Test the email functionality
- Don't click the option more than once! The menu will remain on screen after the email is sent.
- Check your inbox to see if you received the employee list.
You are all done! Thank you!
Thanks for trying out this lab!
As a next step, try to think of creative ways to enhance the screens or the funcionality behind the screens you built.
Leave questions or comments for us here: